On the Players page you can configure the player to be integrated on your site by deciding which channels should be part of it.
To edit the channel on a player:
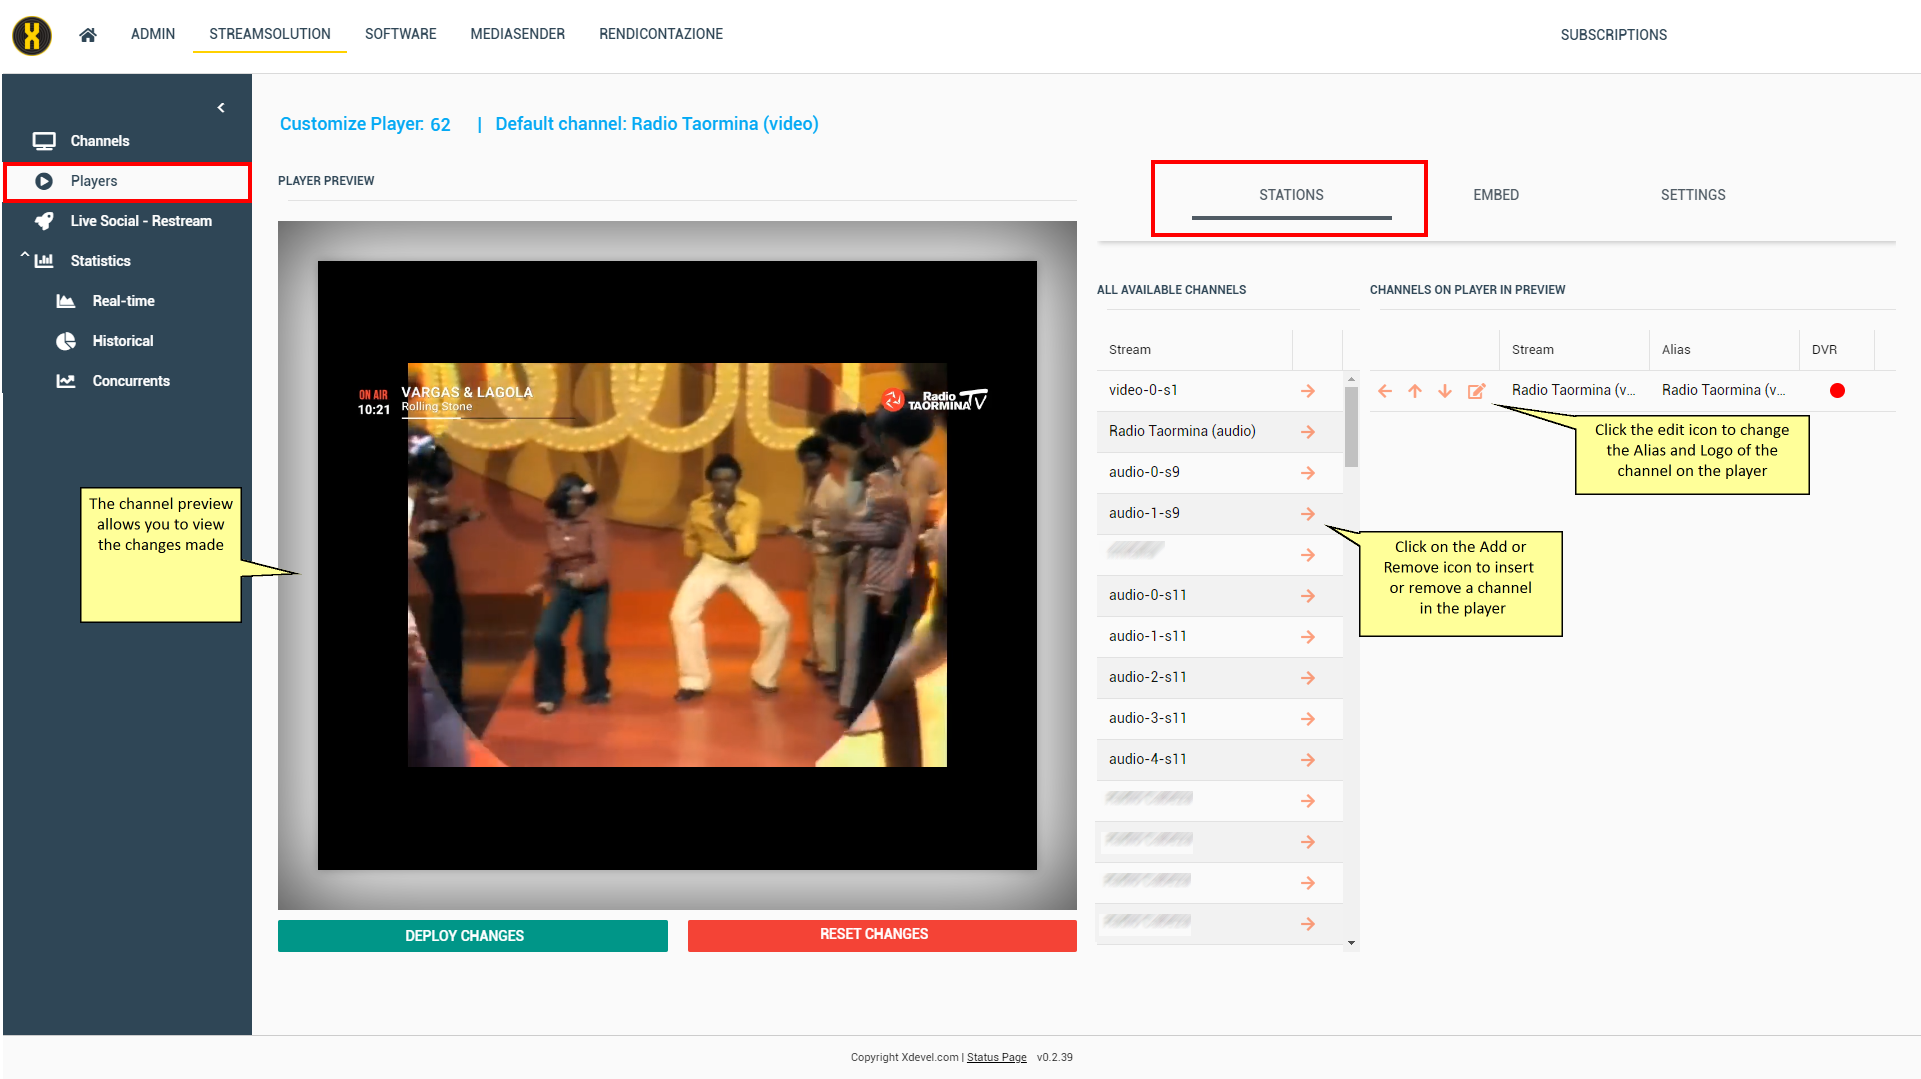
1.Click on the Players page.
All available channels are displayed on this page.
2.Click the Edit icon of the desired channel.
The player personalization window opens.
The window is composed of the Preview of the player and three tabs: Stations, Embed and Settings.
The Stations tab allows you to view all the available channels and the channels currently inserted on the player.
From here it is possible to add or remove channels on the player, decide the order in which the channels are displayed on the player (the first in the list represents the default channel, or the first that is shown when the streaming is opened), change the alias and the logo of the channels on the player.

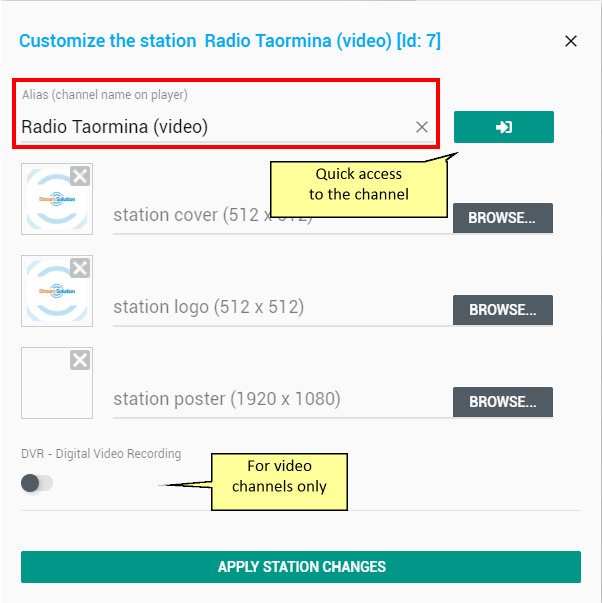
Specifically, by clicking on the Edit icon you can:
•Change the alias (represents the name of the channel on the player).
•Insert/modify the station cover. You can select the file through the Browse... button.
•Insert/modify the logo of the station. You can select the file through the Browse... button.
•Insert/modify the station poster (background) only for video channels. You can select the file through the Browse... button.
•Enable/disable the DVR (Digital Video Recording) only for video channels.
•Quickly access channel details.

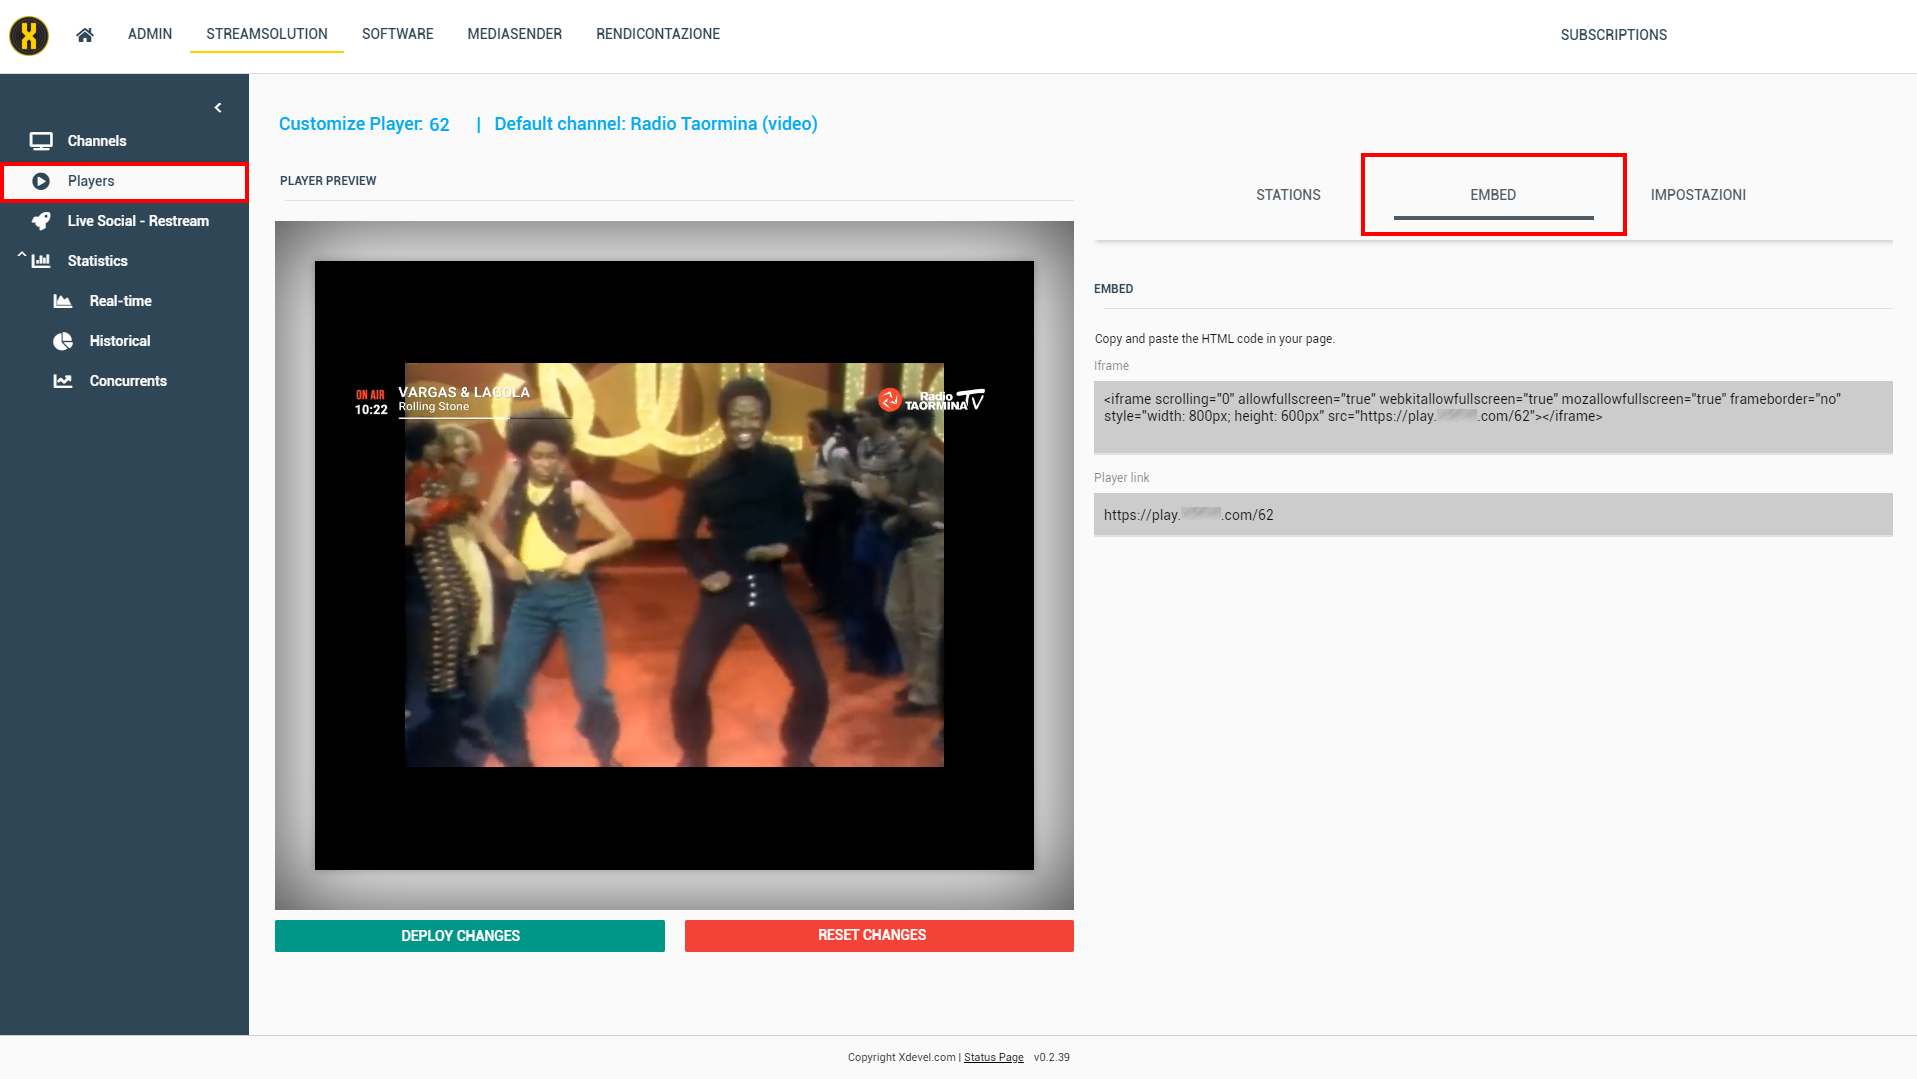
The Embed tab allows you to view the HTML code and the Player link.

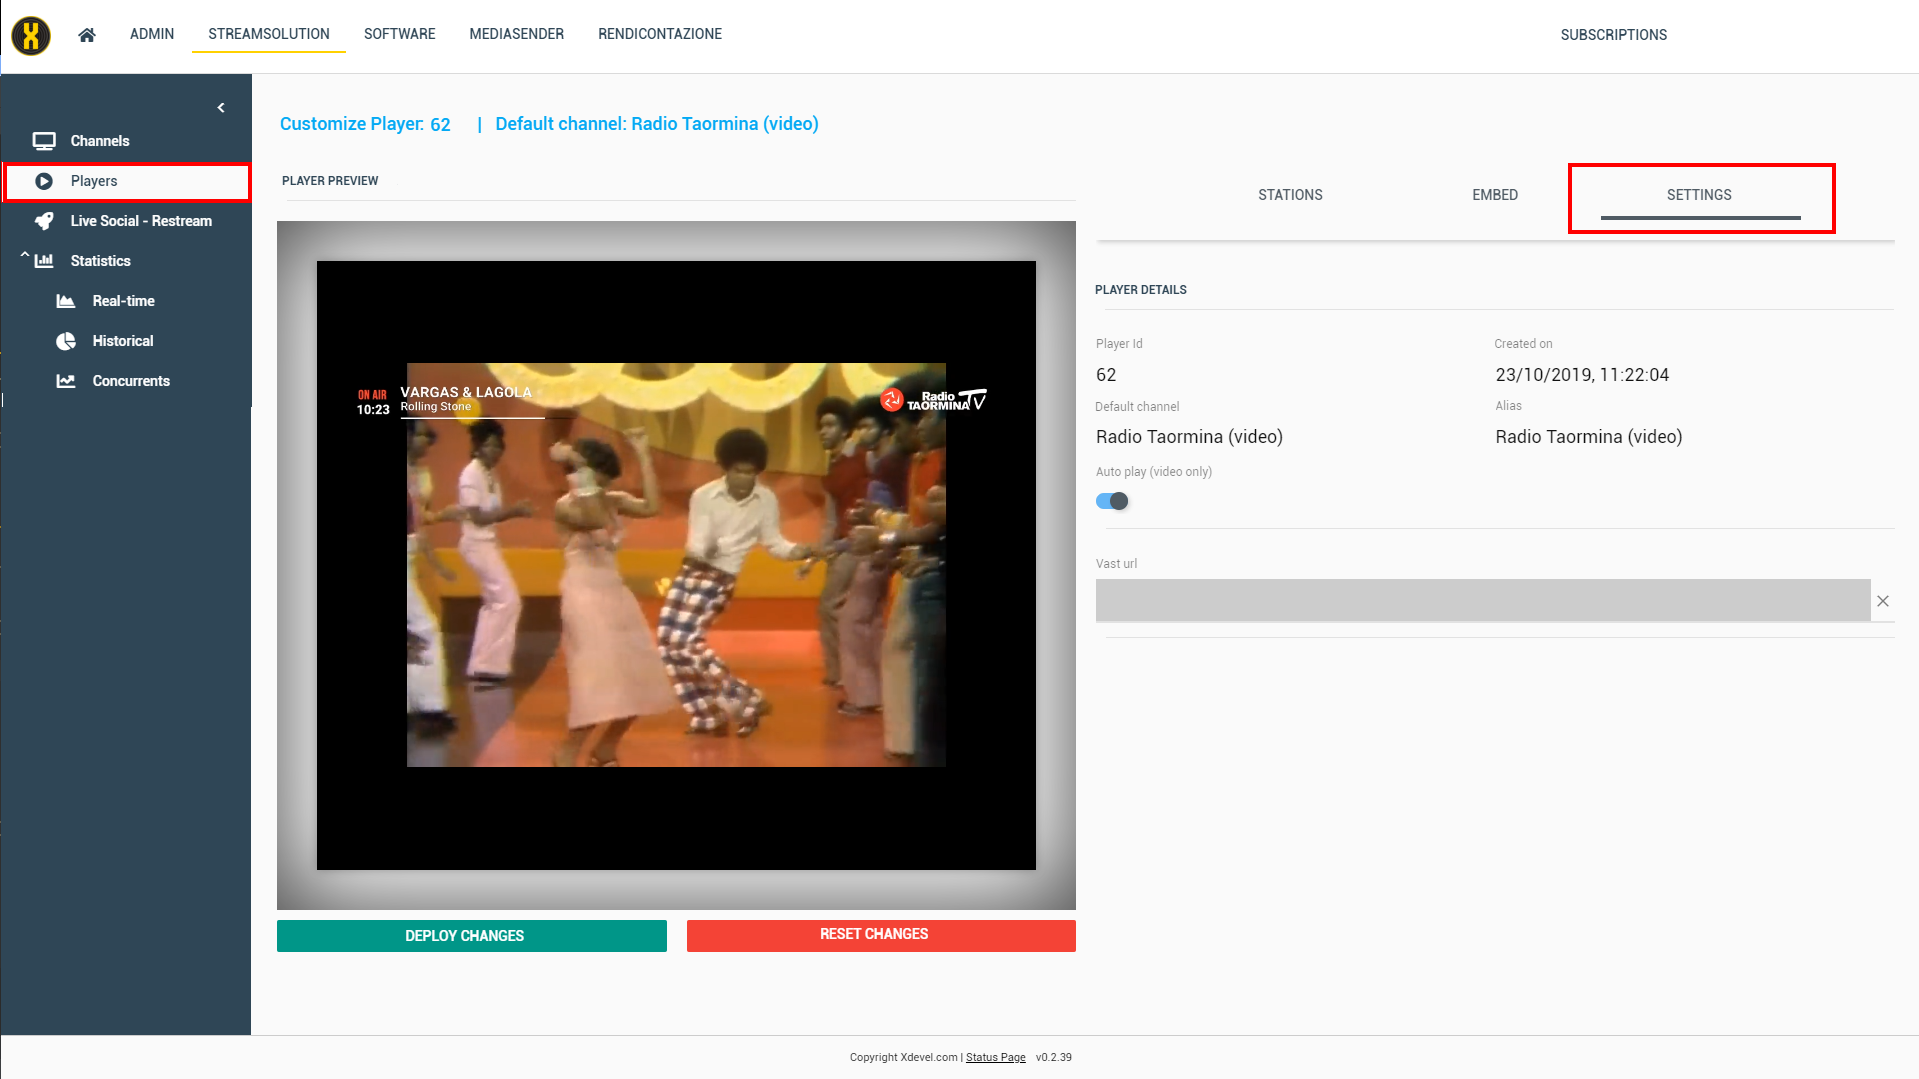
The Settings tab allows you to view all the player details, in the case of video channels to activate/deactivate auto play and insert a Vast url for the publication of video ads.

During the modifications, on the player preview, it is possible to see if the result is the desired one.
If you want to undo all the changes made, click the Reset Changes button. If not, to make the changes permanent, you need to click the Deploy Changes button.
